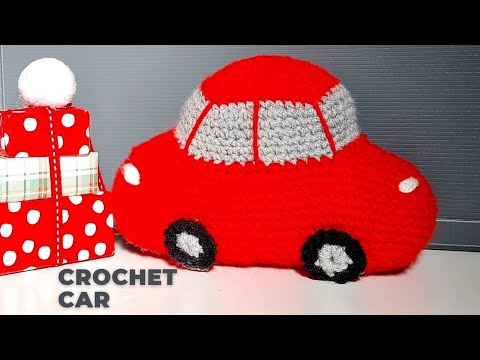
How to crochet an easy amigurumi toy car.
For this car you can use any type of yarn and smaller size hook than recommended on the label. Time code: 00:00 Intro 04:23 Row1 of roof 07.09 Row2 08:50 Row3 10:50 Row4 13:24 Crochet 2 rows by yourself 15:00 Start windows 15:33 Starting the hood of the car 18:40 Starting the trunk 19:40 Crochet the car around row1 25:09 Row2 28:10 Crochet 7 rows with no increase 30:49 Crochet bottom 30:56 Sew the bottom 34:13 Making windows and wheels 38:00 Finished I counted chain 1 as sc, you may do the same or when you chain 1 add sc, and then don't count chain 1 as stitch. Roof Row 1: Chain 6, 4sc, 3 sc into last stitch, 3sc, 2 sc into first stitch. (12 sc) Row 2: Chain 1, 3 sc, inc, sc, inc, 3sc, inc, sc, inc, and sl.st (16 sc) Row 3: Chain 1, 4sc, inc, 3 sc, inc, 3sc, inc, 3 sc, inc, sl st (20 sc) Row 4: Chain 1, 3sc, inc-3sc, 4sc, inc- 3, 4sc, inc-3sc, 4sc, inc-3sc, sl st ( 28sc) Row 5: Chain 1, 5sc, inc- 3sc, (6sc, inc 3 - sc)*3, sl. st (36sc) Row 6: Chain 1, 7sc, inc - 3sc, (8sc, inc- 3sc)*3, sl.st. (44sc) Crochet Christmas Ornaments are very popular on my channel, so check the playlist: https://www.youtube.com/playlist?list=PLIT-ec8utcQtRCWFQ-hVfBsfCiodVOeEm Written pattern: https://kim-craft.blogspot.com/ My Blog: https://kim-craft.blogspot.com/ My Facebook group: https://www.facebook.com/kimkcraft/ My Pinterest: https://www.pinterest.it/kimcraftshop/_created/ #crochet #amigurumi #toy #car #fun #decoration #kid #children #decor #diy #howto #handmade #handcraft
Video
Share
Facebook Comments
Popular Videos


 | How To Crochet Character Amigurumi | @AmiSaigo...")
#202 | Pooh Bear Amigurumi Crochet Pattern (3/4) | How To Crochet Character Amigurumi | @AmiSaigo...


Crochet Car Hanger/Mirror Pendant ???? | Chick Bunny Totoro Swinging Car Accessories ???? Easy Tu...

((English subtitle)")


")

")

Popular Videos


