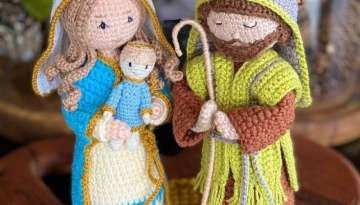
Amigurumi doll crochet pattern
Foody DaD is a video Center
- 1 | 3

????️ Materials List Amigurumi Yarn: Skin Color: For the head, body, arms, and legs (e.g., Gazzal Baby Cotton, Schachenmayr Catania, etc.). Red: For the skirt, hair buns/headband, bag, and jacket details. Black: For the bustier, bag details, boots, and headband antennas. Auburn/Ginger: For the hair. White: For the wings and the polka-dot neck scarf. Crochet Hook: 2.00 mm or 2.20 mm depending on your yarn gauge. Safety Eyes: 10 mm or 12 mm black safety eyes. Fiberfill: Polyester toy stuffing. For the Jacket: Red sequined amigurumi yarn (or plain red yarn with small red sequins sewn on afterward) and a miniature black zipper detail. Accessories & Support: Craft/Electrical Wire: Insulated copper wire to place inside the legs and neck so the doll can stand firmly and hold its pose. Wing Wire: Thin wire to structure the wings (if crafting them using organze/tulle or crocheting over wire). Red Beads: For the bracelets and earrings. Tools: Stitch marker, tapestry needle, scissors, and pink blush for the cheeks. ???? Abbreviations MR: Magic Ring Sc: Single crochet Inc: Increase (2 single crochets in the same stitch) Dec: Decrease (Crochet 2 stitches together) W: 3 single crochets in the same stitch BLO: Back loop only FLO: Front loop only Ch: Chain
- 2 | 3

???? Step-by-Step Crochet Pattern 1. Head (Skin Color) Make sure to stuff firmly as you go and insert the safety eyes at the designated rounds. Round 1: 6 sc in MR (6) Round 2: 6 inc (12) Round 3: (1 sc, 1 inc) * 6 (18) Round 4: (2 sc, 1 inc) * 6 (24) Round 5: (3 sc, 1 inc) * 6 (30) Round 6: (4 sc, 1 inc) * 6 (36) Round 7: (5 sc, 1 inc) * 6 (42) Round 8: (6 sc, 1 inc) * 6 (48) Round 9: (7 sc, 1 inc) * 6 (54) Rounds 10-22: Sc in each stitch around for 13 rounds (54) Insert the safety eyes between rounds 17 and 18, leaving about 8-9 stitches of space between them. Round 23: (7 sc, 1 dec) * 6 (48) Round 24: (6 sc, 1 dec) * 6 (42) Round 25: (5 sc, 1 dec) * 6 (36) Round 26: (4 sc, 1 dec) * 6 (30) Round 27: (3 sc, 1 dec) * 6 (24) -> Stuff the head firmly with fiberfill. Round 28: (2 sc, 1 dec) * 6 (18) Round 29: (1 sc, 1 dec) * 6 (12) Rounds 30-32: 12 sc (Crochet 3 rounds flat for the neck, then fasten off). 2. Arms (Make 2 - Skin Color) Round 1: 5 sc in MR (5) Round 2: 5 inc (10) Rounds 3-5: 10 sc (3 rounds) Round 6: 1 popcorn stitch (for the thumb), 9 sc (10) Round 7: 1 dec, 8 sc (9) Rounds 8-28: Sc in each stitch around for 21 rounds (9). Stuff very lightly or insert a thin piece of wire. Fasten off, leaving a long tail for sewing. 3. Legs & Body Joining Since the doll has a crossed-leg pose, you must insert wire inside the legs for flexibility and stability. Legs (Make 2) (Note: If the boots are a separate removable piece like in the photo, start directly with the skin color yarn). Round 1: Ch 6, starting from the 2nd chain from hook: 1 inc, 3 sc, 3 sc in the last chain stitch. Turn to work along the opposite side of the chain: 4 sc (12) Round 2: 2 inc, 3 sc, 3 inc, 3 sc, 1 inc (18) Round 3: BLO 18 sc (18) Rounds 4-5: 18 sc (2 rounds) Round 6: 5 sc, 4 dec, 5 sc (14) Round 7: 4 sc, 3 dec, 4 sc (11) Rounds 8-32: Sc in each stitch around for 25 rounds (11). (Optional: To shape the knees, you can work 2 inc at the front and 1 dec at the back on round 18). Joining the Body Align the two legs so that the join will sit neatly at the back. Join them together by chaining 3 chains between them. Round 33: 11 sc (around the first leg), 3 sc along the chain, 11 sc (around the second leg), 3 sc along the opposite side of the chain (Total: 28 sc) Rounds 34-40: 28 sc (7 rounds flat). -> You can switch to black yarn here to start the base of the bustier. Round 41: (5 sc, 1 dec) * 4 (24) Rounds 42-48: 24 sc (7 rounds flat using black/skin color as preferred). Round 49: When you reach the arm height, attach the arms to the body: Crochet 3 sc through both the inner arm and body on the right side, 9 sc across the chest, 3 sc through both the inner arm and body on the left side, and 9 sc across the back. Round 50: Continue crocheting around the outside remaining stitches of the arms, beginning decreases across the shoulders to taper the stitch count back down to 12 sc for the neck.
- 3 | 3

???? Clothes & Accessories Hair & Buns (Auburn/Ginger) Hair Base: Start exactly like the head pattern and increase up to Round 9 (54 sc). Sew this onto the back of the head like a wig cap. Bangs & Curls: When working the front section of the hair base, chain 15–20 and work 2 sc in each chain to create tight, bouncy curls. Shape and pin them framing the face. Buns (Make 2): 6 sc in MR -> 12 sc -> 18 sc -> 24 sc -> 30 sc. Crochet 4 rounds flat, stuff with fiberfill, and sew them onto both sides of the head. Red Pleated Skirt Attach red yarn to the FLO loops at the waistline. Round 1: Inc in every stitch across the row to maximize volume. Round 2: (1 sc, 1 inc) around to flare out the skirt. Rounds 3-15: Sc in each stitch around until the skirt reaches your desired length. Ladybug Headband & Bag Headband: Measure the circumference of the doll’s head with red yarn and chain that length (e.g., 50 ch). Work 2 rows of half double crochets. Use black yarn to embroider French knots or crochet tiny circles (6 sc in MR) to sew on as ladybug spots. For the antennas, chain 8 with black yarn and work a 3-dc puff stitch at the tip. Bag: Crochet 2 identical flat red discs (6 sc in MR -> 12 -> 18 -> 24 -> 32 sc). Crochet a long, narrow strip with black yarn and sew it between the two discs to join them. Embroider the center line and spots with black thread. Wings For the translucent, iridescent look in the photo, shape a thin wire into wing frames, wrap them with white organza/tulle fabric, and decorate them with glitter paint or tiny sequins. If you prefer to crochet them: Use fine white lace yarn, start with a long chain, and work a mix of single, half-double, and double crochets around the chain to build a tapered, leaf-shaped wing structure. ???? Assembly & Finishing Touches Wiring: Insert your pre-bent wire frame down through the body and into the legs. Pack fiberfill tightly around the wire to fully fill out the body shapes. Attaching the Head: Push the top of the neck wire into the base of the head. Using skin-colored yarn, securely sew the neck to the head using an invisible mattress stitch. Face Sculpting: Thread a needle with skin-colored yarn, insert it from the base of the head, pull through just under the eyes, and pull back down to create gentle eye sockets. Embroider eyelashes and eyebrows with fine black embroidery floss. Add a touch of pink cosmetic blush to the cheeks and knees for a rosy tint.
Popular Videos





Related Galleries