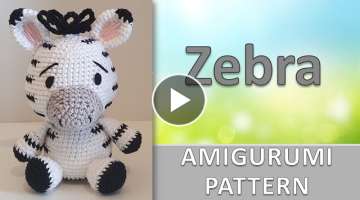
Amigurumi cat crochet free pattern
Foody DaD is a video Center
- 1 | 4

???? Materials Needed Main Color Yarn: White amigurumi yarn (e.g., medium/sport weight, 50% cotton and 50% acrylic blend). Detail Colors: Black yarn (for the chest heart and tail patterns); a small amount of pink yarn (for the inner ears). Crochet Hook: 2.0 mm or 2.5 mm (or a size suitable for your yarn to keep stitches tight). Safety Eyes: 12 mm or 14 mm green safety eyes (8 mm if making the smaller kitten). Safety Nose: Small pink plastic safety nose, or pink embroidery floss to sew one on. Stuffing: Polyester fiberfill. Tools: Stitch marker, tapestry needle, and scissors. ???? Abbreviations (US Terms) MR: Magic Ring Sc: Single Crochet Inc: Increase (2 single crochets in the same stitch) Dec: Decrease (Invisible decrease is recommended) Hdc: Half Double Crochet Dc: Double Crochet Tr: Treble Crochet Ch: Chain Sl St: Slip Stitch BLO: Back Loops Only (....) * n: Repeat the instructions inside the parentheses "n" times. ???? Head Crocheted from the top of the head down to the neck. Rnd 1: 6 sc in MR (6) Rnd 2: 6 inc (12) Rnd 3: (1 sc, inc) * 6 (18) Rnd 4: (2 sc, inc) * 6 (24) Rnd 5: (3 sc, inc) * 6 (30) Rnd 6: (4 sc, inc) * 6 (36) Rnd 7: (5 sc, inc) * 6 (42) Rnd 8: (6 sc, inc) * 6 (48) Rnds 9-15: 48 sc (7 rounds total) Rnd 16 (Cheek Increases): 12 sc, (inc, 1 sc) * 4, 8 sc, (1 sc, inc) * 4, 12 sc (56) Rnds 17-18: 56 sc Note: Place the green safety eyes between rounds 14 and 15, leaving about 8 to 9 stitches of space between them. Secure the pink safety nose exactly centered between and one round below the eyes. Rnd 19: 12 sc, (dec, 1 sc) * 4, 8 sc, (1 sc, dec) * 4, 12 sc (48) Rnd 20: (6 sc, dec) * 6 (42) Rnd 21: (5 sc, dec) * 6 (36) Rnd 22: (4 sc, dec) * 6 (30) Stuff the head firmly with fiberfill. Pay extra attention to shaping the cheek areas so they look plump and rounded. Rnd 23: (3 sc, dec) * 6 (24) Rnd 24: (2 sc, dec) * 6 (18) Fasten off, leaving a long tail for sewing.
- 2 | 4

???? Body Crocheted from the back/rear toward the neck. Rnd 1: 6 sc in MR (6) Rnd 2: 6 inc (12) Rnd 3: (1 sc, inc) * 6 (18) Rnd 4: (2 sc, inc) * 6 (24) Rnd 5: (3 sc, inc) * 6 (30) Rnd 6: (4 sc, inc) * 6 (36) Rnd 7: (5 sc, inc) * 6 (42) Rnd 8: (6 sc, inc) * 6 (48) Rnds 9-22: 48 sc (14 rounds total) Rnd 23: (6 sc, dec) * 6 (42) Rnd 24: (5 sc, dec) * 6 (36) Rnd 25: (4 sc, dec) * 6 (30) Rnd 26: (3 sc, dec) * 6 (24) Stuff the body firmly with fiberfill. Rnd 27: (2 sc, dec) * 6 (18) Fasten off and weave in the ends. ???? Legs (Make 4) Both front and back legs are made using the same pattern. The lower paw is made wider to create a flat, stable foot. Rnd 1: 6 sc in MR (6) Rnd 2: 6 inc (12) Rnd 3: (1 sc, inc) * 6 (18) Rnd 4: (2 sc, inc) * 6 (24) Rnd 5 (Paw Ridge): BLO 24 sc (24) Rnds 6-7: 24 sc Rnd 8: 6 sc, 6 dec, 6 sc (18) (This decrease curve forms the front of the paw) Rnds 9-15: 18 sc (7 rounds total) Stuff the leg firmly with fiberfill. Rnd 16: (1 sc, dec) * 6 (12) Fasten off, leaving a long tail for sewing.
- 3 | 4

???? Ears (Make 2) Pink Inner Ear (Make 2) Row 1: Ch 5. Row 2: Starting from the 2nd chain from hook: 1 sc, 1 hdc, 1 dc, then work 3 dc into the very last chain. Turn to work along the opposite side of the chain foundation: 1 dc, 1 hdc, 1 sc. Fasten off. White Outer Ear (Make 2) Rnd 1: 6 sc in MR (6) Rnd 2: (1 sc, inc) * 3 (9) Rnd 3: (2 sc, inc) * 3 (12) Rnd 4: (3 sc, inc) * 3 (15) Rnd 5: (4 sc, inc) * 3 (18) Rnd 6: (5 sc, inc) * 3 (21) Sew the pink inner ear onto the flat side of the white outer ear. Fasten off, leaving a long tail on the white yarn for sewing. ???? Chest Heart Patch Using black yarn. Rnd 1: In a MR, work the following: ch 3, 3 tr, 3 dc, ch 1, 1 tr (this creates the bottom point of the heart), ch 1, 3 dc, 3 tr, ch 2, sl st into the center of the ring. Pull the magic ring tail tightly to close the center hole and form a perfect heart shape. Fasten off, leaving a long tail for sewing. ???? Tail To get the signature fluffy, brushed look from the image, we will build a base and then add brushed-out yarn. Start with white yarn. Rnd 1: 6 sc in MR (6) Rnd 2: 6 inc (12) Rnd 3: (1 sc, inc) * 6 (18) Rnds 4-8: 18 sc (Alternate between black and white yarn every 2 rounds to create stripes) Rnds 9-15: Decrease by 1 stitch in each round (while keeping up the alternating color stripes) until you have 12 stitches left. Stuff the tail lightly with fiberfill. Fasten off, leaving a long tail for sewing.
- 4 | 4

How to Make the Tail Ultra-Fluffy: Once the tail base is crocheted, cut short strands (about 5-6 cm) of black and white yarn. Using your crochet hook, loop and knot these strands into the corresponding colored sections of the tail (like adding hair to a doll). Once the tail is fully covered, take a wire pet slicker brush (or a fine-toothed comb) and brush the yarn vigorously until the fibers completely separate and turn into soft fluff. Trim the fluffed fibers with scissors to shape it into the tapered, bushy tail seen in the photo. ???? Assembly and Face Shaping Sculpting the Eyes: To give your cat those deep, adorable expression lines, thread a needle with white yarn. Insert it from the bottom neck opening, bring it out at the outer corner of one eye, insert it into the inner corner, and bring it back down to the neck. Pull gently to sink the eye slightly, tie a knot at the neck to secure, and repeat for the other eye. Mouth details: Embroider a tiny vertical line extending down from the center of the pink nose using thin black or dark grey embroidery floss. Attaching the Head: Sew the neck of the head securely to the front-top opening of the body. Make sure the head is angled slightly upward for a cute look. Attaching the Legs: Stand the body on a flat surface. Position the front two legs side-by-side directly under the chest. Pin the rear legs to the lower sides of the body. Once the cat sits balanced and level, sew the legs securely in place. Heart Patch: Center the black heart on the chest and sew it flat. Ears: Position the ears on top of the head between rounds 5 and 11, curving them slightly forward, and sew them down. Tail: Sew the base of the fluffy tail to the back of the body, pointing straight up.
Popular Videos





Related Galleries